I. Understanding Plate Decals: Types and Materials
II. Step-by-Step Guide to Upcycling Plates with Decals
III. Creative Ideas for Decorating with Upcycled Plate Decals
Understanding Plate Decals: Types and Materials
Hey there! If you’ve ever thought about adding a personal touch to your home decor or revamping some old dinnerware, plate decals are a fab way to get creative. Let’s dive into the world of plate decals, exploring the different types and materials that can make your upcycling adventures both fun and rewarding!
Types of Plate Decals
Plate decals come in various types, each with its own unique charm and application. Here’s a quick breakdown:
- Water Slide Decals: These are super popular because they’re easy to apply. You soak them in water, slide them onto your plate, and voilà! They typically come in a wide range of designs, from floral patterns to quirky quotes.
- Vinyl Decals: If you’re looking for something durable, vinyl decals are the way to go. They’re made of a strong material that can withstand regular use, making them perfect for plates that you’ll actually use for meals. Plus, they come in a rainbow of colors!
- Transfer Decals: Transfer decals are often used for intricate designs. You place the decal on your plate and rub it in, transferring the image onto the surface. They can be a bit tricky but yield stunning results.
- Porcelain Paint Decals: These allow for even more personalization. Using special porcelain paints, you can create your own designs and then fire the plate in the oven to set everything. This method gives you the freedom to express your artistic side!
Materials for Plate Decals
Understanding the materials used in plate decals is just as important as the types. Here’s a quick overview:
- Paper: Water slide decals are often made from a special type of paper that can withstand a soak. They’re lightweight and easy to manage, making them a popular choice for DIY projects.
- Vinyl: As mentioned, vinyl decals are crafted from a strong synthetic material. They’re not just durable; they’re also easy to remove, which means you can change your designs as often as you like!
- Porcelain Paints: If you choose to work with porcelain paint decals, you’ll find that they’re designed specifically for ceramics. They often require baking to properly set, making them a long-lasting option.
- Adhesive: The adhesive used on decals is crucial for a successful application. Most decals come pre-coated with a strong adhesive that ensures they stick well to the plate surface.
Choosing the Right Decal for Your Project
Now that you’re familiar with the various types and materials, it’s essential to choose the right decal for your project. Think about:
- Usage: Will the plates be decorative, or will they see regular use? Choose a durable material if they’re for everyday meals.
- Design: What vibe are you going for? Fun and whimsical, or elegant and classy? Pick a design that reflects your personality.
- Application: Are you comfortable with intricate work, or do you prefer something quick and easy? Your skill level can guide your choice of decal type.
In conclusion, understanding the different types and materials of plate decals can really help elevate your upcycling game. With the right decals, you can turn plain plates into stunning pieces of art. So grab some plates, and let’s get ready to unleash our creativity!
Step-by-Step Guide to Upcycling Plates with Decals
Ready to give your old plates a fabulous makeover? Upcycling plates with decals is a fun and creative way to breathe new life into your dinnerware. Not only will you have unique pieces for your home, but you’ll also be practicing sustainability! Let’s dive into this step-by-step guide to help you get started.
What You’ll Need
Before we jump into the process, let’s gather some supplies. Here’s what you’ll need:
- Old plates (ceramic or glass work best)
- Decals (these can be purchased or homemade)
- Clear varnish or Mod Podge
- Paintbrush or sponge applicator
- Scissors (if you need to cut decals)
- Water (for soaking decals, if necessary)
- Oven (for setting the decals, optional)
Step 1: Clean Your Plates
First things first! Make sure your plates are clean and free from any dirt or grease. A simple soapy wash will do the trick. Rinse them thoroughly and let them dry completely. This will ensure the decals adhere properly.
Step 2: Prepare Your Decals
If you’re using store-bought decals, read the instructions carefully. Some may require soaking in water before applying. If you’re feeling crafty and want to make your own decals, grab some transparent decal paper and print your favorite designs. Cut them out neatly, and you’re ready to go!
Step 3: Placement is Key
Now comes the fun part—deciding where to place your decals! Experiment with different designs and placements on the plate. You can lay them out flat or create a more dynamic look by overlapping them. Take a step back and visualize how it will look once the decals are on. Once you’re happy, it’s time to get sticking!
Step 4: Apply the Decals
For applying the decals, gently peel them off their backing and place them on the plate. If you’re dealing with water-slide decals, soak them in water first, then slide them onto the plate. Use your fingers to smooth out any air bubbles, and take your time to ensure they lie flat without creases.
Step 5: Seal the Deal
To ensure your beautiful designs last, you’ll want to seal them with a clear varnish or Mod Podge. Use a paintbrush or sponge applicator to apply a thin layer over the entire surface of the plate, making sure to cover the decals well. Let it dry completely before applying a second coat if necessary. This not only protects your artwork but also gives it a lovely finish!
Step 6: Setting the Decals (Optional)
If you want to make your decals more durable, you can set them in the oven. Preheat your oven to around 350°F (175°C), and place your plates inside for about 30 minutes. This step is particularly helpful for those using dishwasher-safe decals.
Step 7: Enjoy Your Upcycled Plates
Once everything is dry and set, your upcycled plates are ready to shine! Use them as decorative pieces, serve snacks, or gift them to friends. The best part? You made them with your own two hands!
And there you have it! Upcycling plates with decals is a straightforward and delightful process. Get creative, have fun with it, and embrace your inner artist!
Creative Ideas for Decorating with Upcycled Plate Decals
Are you ready to unleash your inner artist and transform your home with some charming upcycled plate decals? Using these delightful pieces can add a unique touch to your decor while also being eco-friendly. Let’s dive into some creative ideas that will inspire you to decorate with flair!
1. Create a Stunning Wall Art Gallery
One of the most captivating ways to display your upcycled plate decals is by turning them into a wall art gallery. Here’s how you can do it:
- Choose a Theme: Select a color palette or theme that resonates with your personal style. Floral patterns, vintage motifs, or even abstract designs can create a cohesive look.
- Mix and Match: Don’t be afraid to mix different sizes and shapes of plates. A combination of small and large plates can create a dynamic visual effect.
- Hanging Techniques: Use plate hangers, adhesive plate grips, or even a decorative plate rack to display your collection. Experiment with arrangements before committing to a final design!
2. Charming Centerpieces for Your Table
Your dining table deserves a show-stopping centerpiece, and upcycled plate decals can help you achieve just that. Here are a few ideas:
- Tiered Tray Display: Use different-sized plates to create a tiered tray filled with seasonal decorations, flowers, or even desserts. This adds height and interest to your table setting.
- Plate Stand Arrangements: Lean decorative plates against a beautiful vase or an elegant candlestick. Layering various plates can create depth and visual intrigue.
3. Whimsical Serving Dishes
Turn your upcycled plates into serving dishes that are sure to impress your guests. Here are some fun ideas:
- Snack and Dessert Plates: Use smaller plates with beautiful decals for appetizers or desserts. They act as delightful conversation starters!
- Garden Party Vibe: For outdoor gatherings, set up a buffet with your upcycled plates as serving platters. The unique design will elevate the overall aesthetic.
4. Unique Home Accents
Why stop at traditional decor? Get creative with how you incorporate your upcycled plate decals into various aspects of your home:
- Light Fixtures: Attach smaller plates to a lamp shade or pendant light for a quirky touch that’ll brighten up your space.
- Wall Clocks: Transform a decorative plate into a whimsical wall clock. All you need is a clock kit, and you can customize the timepiece to match your decor!
5. Personalized Gifts
Lastly, consider using your upcycled plates to create personalized gifts for loved ones. Here are some cute ideas:
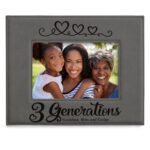
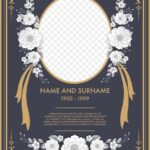
- Custom Décor: Create a decorative plate featuring a meaningful quote or date, perfect for weddings or anniversaries.
- Personalized Kitchenware: Use plates with decals that reflect the recipient’s style and interests for a thoughtful housewarming gift.
With these creative ideas, your upcycled plate decals can truly shine in your home decor. So gather those beautiful plates and let your creativity flow! Remember, decorating should be fun, so experiment and enjoy the process!


Comments