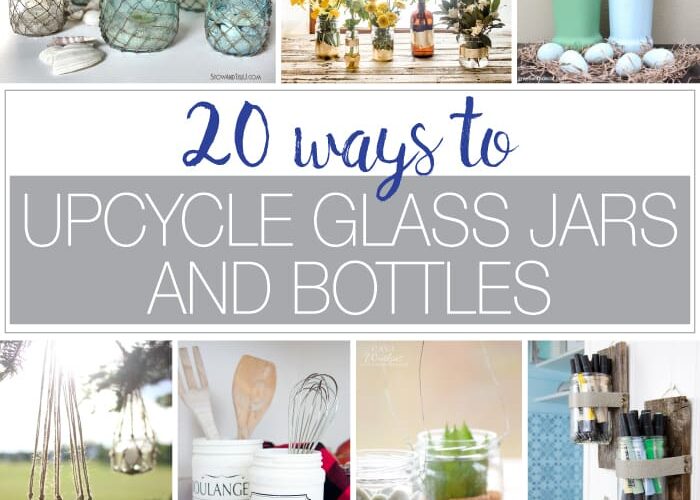
I. Creative Uses for Upcycled Glass Bottles
II. Step-by-Step Guide to Upcycling Glass Bottles
III. Tips for Safe and Effective Upcycling of Glass Bottles
Creative Uses for Upcycled Glass Bottles
Hey there, fellow DIY enthusiast! If you’re like me, you probably have a few glass bottles sitting around your home, maybe from that fancy olive oil or the last sparkling water you enjoyed. Instead of tossing them in the recycling bin, why not unleash your creativity and turn those humble bottles into something extraordinary? Here are some fun and inventive ways to upcycle glass bottles that will not only beautify your space but also make you feel good about reducing waste!
1. Stylish Planters
Got a green thumb? Glass bottles make fantastic planters! Just cut the bottle in half, fill the bottom part with soil, and plant your favorite herbs or flowers. You can even decorate the outside with paint or twine to add a personal touch. Hang them from a wall or place them on your windowsill for a charming garden vibe. Plus, the glass allows for good sunlight penetration!
2. Creative Candle Holders
Transform your bottles into stunning candle holders. Whether you prefer tealights, pillar candles, or even string lights, glass bottles can add an enchanting ambiance to your home. Simply remove the label, clean the bottle, and place a candle inside. For a more rustic look, you can cut the neck of the bottle to create a unique holder. Group a few together for a beautiful centerpiece!
3. Eye-Catching Vases
Why buy a new vase when you can make one from a glass bottle? With just a little creativity, you can turn any bottle into a beautiful vase. Paint it, wrap it in jute, or leave it as-is for a minimalist look. Fill it with fresh flowers, dried branches, or even decorative pebbles. The options are endless!
4. Unique Lighting Fixtures
Turn your glass bottles into stunning light fixtures! By simply wiring a light bulb into the bottle, you can create a beautiful pendant light that serves as a conversation starter. You can even use multiple bottles to create a cluster of pendant lights, adding a unique flair to your dining area or kitchen.
5. Homemade Bird Feeders
Help feed our feathered friends by turning glass bottles into bird feeders! With a few simple modifications, such as cutting holes and inserting perches, you can create a delightful feeding station for birds in your backyard. Hang it from a tree branch, and watch as the birds flock to enjoy their meals!
6. Decorative Wall Art
Get crafty and create stunning wall art! You can paint or etch designs onto your glass bottles and arrange them on a wooden board or directly on your walls. This creates a unique visual piece that showcases your artistic flair while repurposing materials you already have.
7. Functional Kitchen Organizers
Glass bottles can also serve a practical purpose in your kitchen! Use them to store dry goods like pasta, rice, or grains. You can even label them for easy identification. Not only do they look great, but they also help keep your pantry organized and clutter-free.
So there you have it! With a little imagination, those old glass bottles can find new life in your home. Get inspired, gather your supplies, and let your creative juices flow. Happy upcycling!
Step-by-Step Guide to Upcycling Glass Bottles
Are you ready to turn those empty glass bottles into something beautiful and functional? Upcycling is a fantastic way to give new life to items that would otherwise end up in the trash. Follow this easy step-by-step guide to transform your glass bottles into creative masterpieces!
Step 1: Gather Your Materials
Before diving in, let’s gather everything you need:
- Empty glass bottles (any size will do!)
- Tools for cutting (like a glass cutter or a saw)
- Sandpaper or a sanding block
- Paint or decorative materials (like twine, fabric, or stickers)
- Sealer or adhesive (if necessary)
- Protective gear (gloves and goggles)
Step 2: Clean Your Bottles
First things first, let’s make sure your bottles are squeaky clean! Rinse them out to remove any leftover residue or labels. A little warm soapy water will do wonders. Once clean, let them dry completely. This step is crucial to ensure your new creations adhere well and look great.
Step 3: Cutting the Bottles (if needed)
If you’re planning to create something that requires cutting the glass, it’s crucial to do this carefully. Here’s how:
- Mark where you want to cut the bottle using a marker.
- Using your glass cutter, gently score along the marked line, applying even pressure.
- To separate the bottle, run the scored line under hot water for a few seconds, then immediately place it under cold water. This temperature change creates stress in the glass, helping it break along the score line.
Remember to wear your protective gear for safety!
Step 4: Smooth the Edges
After cutting, you’ll want to smooth out any sharp edges. Take your sandpaper or sanding block and gently sand down the cut edges until they are nice and smooth. This will prevent any accidental cuts later on.
Step 5: Get Creative with Decoration
Now the fun really begins! Use your creativity to decorate the bottle. Here are some ideas:
- Paint: Use acrylic paint to add a pop of color.
- Wrap: Twine or ribbon can add a rustic touch.
- Stickers: Personalize with stickers or decals that reflect your style.
- Glass etching: For a more polished look, try etching designs into the glass.
Step 6: Final Touches
Once you’re happy with your design, apply a sealer if necessary, especially if you’ve used paint. This will help protect your creation and make it last longer. Let everything dry completely before using your newly upcycled glass bottle.
Step 7: Enjoy Your Creation!
Congratulations! You’ve successfully upcycled your glass bottle into something unique and functional. Whether it’s a beautiful vase, a candle holder, or a quirky storage container, take a moment to admire your work. You can also share your creation with friends and family or show it off on social media!
Now that you have this guide, you’re ready to start your upcycling journey. Don’t be afraid to experiment and have fun along the way!
Tips for Safe and Effective Upcycling of Glass Bottles
So, you’ve decided to dive into the world of upcycling glass bottles—exciting, right? It’s a fantastic way to express your creativity while also being kind to the planet! However, before you start, let’s make sure you do it safely and effectively. Here are some friendly tips to keep your upcycling journey smooth and enjoyable!
1. Gather Your Supplies
Before you start, it’s essential to have all the necessary supplies at hand. This not only makes the process easier but also more enjoyable. Here’s what you’ll need:
- Glass bottles (of course!)
- Safety goggles
- Gloves
- Cutting tools (like a glass cutter or a Dremel tool)
- Sanding tools (sandpaper or a sanding block)
- Paint or sealant (if needed)
- Decorative items (like twine, paint, or beads)
2. Safety First!
When working with glass, safety should always be your top priority. Here are some precautions to keep in mind:
- Wear safety goggles: Protect your eyes from any glass shards or debris.
- Use gloves: This helps to avoid cuts and ensures a better grip when handling the bottles.
- Work in a well-ventilated area: If you’re applying paint or sealants, make sure there’s good air circulation.
- Clean up immediately: After your project, carefully pick up any broken glass or sharp edges to prevent accidents.
3. Choose the Right Techniques
Depending on your upcycling project, different techniques will work best. Here are a few popular methods:
- Cutting: If you want to create vases or candle holders, mastering glass cutting is essential. Take your time and practice on a few bottles before moving to the final product!
- Painting: Glass paint can add a beautiful touch. Make sure to use paint that’s specifically designed for glass to ensure it adheres well and lasts over time.
- Sanding: After cutting, sand the edges to eliminate sharp points. This not only enhances safety but also gives your project a polished finish.
4. Experiment and Have Fun!
Upcycling is all about creativity! Don’t hesitate to try out new designs, colors, and techniques. Here are a couple of ideas to spark your imagination:
- Turn bottles into garden lights using string lights.
- Make beautiful chandeliers by hanging several bottles together.
- Create unique wall art by painting them in bold colors and arranging them in a pattern.
5. Share Your Work
Once you complete your upcycling project, share your creations! Post them on social media or join local craft groups. Not only will this inspire others, but you might also receive valuable feedback and tips!
So there you have it! With these tips in mind, you’re ready to transform those glass bottles into something magical. Enjoy the process, and happy upcycling!


Comments