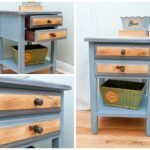
I. Understanding the Basics of Upcycling a Wingback Chair
II. Step-by-Step Guide to Upcycling Your Wingback Chair
III. Creative Ideas for Customizing Your Upcycled Wingback Chair
Understanding the Basics of Upcycling a Wingback Chair
Have you ever looked at a piece of furniture and thought, “What can I do with that?” If you have an old wingback chair lying around, you’re in for a treat! Upcycling is not just about recycling; it’s about taking something that may seem outdated or worn and transforming it into something uniquely yours. So, let’s dive into the world of upcycling, specifically focusing on those charming wingback chairs.
What is Upcycling?
Upcycling is all about giving new life to old items. Rather than tossing your wingback chair into the landfill, you can refresh it with a little creativity and effort. This practice not only helps reduce waste but also allows you to express your personal style. It’s a win-win!
Why Choose a Wingback Chair?
Wingback chairs are classic pieces of furniture, often featuring distinctive high backs and “wings” on either side. They can be found in various styles, from traditional to modern, making them incredibly versatile. Here’s why they make a great candidate for upcycling:
- Timeless Design: Their classic shape never goes out of style, so with some updates, they can fit into any decor.
- Comfort: Wingback chairs are known for their comfort, making them perfect for reading spaces or cozy corners.
- Durability: Many wingback chairs are well-constructed, allowing them to withstand a few DIY projects without falling apart.
- Statement Piece: An upcycled wingback chair can become the focal point of your room, showcasing your creativity and personality.
Assessing Your Chair
Before you embark on your upcycling journey, it’s crucial to assess the condition of your chair. Here are a few things to check:
- Frame: Ensure the frame is sturdy. Shake it gently to see if there are any loose joints.
- Upholstery: Check for tears, stains, or worn-out fabric. These can often be replaced or covered.
- Padding: Sit on the chair and test the cushioning. If it feels flat, you may need to replace or add more padding.
- Style: Consider whether the current style fits your vision. If not, no worries—upcycling is all about creativity!
Planning Your Upcycling Project
Once you’ve assessed your wingback chair, it’s time to plan your transformation! Think about:
- Color Scheme: What colors speak to you? Bold hues or soft pastels? Choose colors that complement your existing decor.
- Fabric Choices: Do you want to reupholster with a classic fabric or something funky and modern? The sky’s the limit!
- Additional Features: Consider adding new legs, decorative trims, or even a slipcover for a quick refresh.
Understanding these basics will set you up for success as you embark on your upcycling adventure. A wingback chair can go from drab to fab with just a little bit of effort and imagination. So grab your tools, put on your creative hat, and let’s make that old chair shine again!
Step-by-Step Guide to Upcycling Your Wingback Chair
So, you’ve decided to give that old wingback chair a brand new life! Upcycling is not just a trend; it’s a way to express your creativity while being kind to the planet. Let’s walk through the steps together to transform that vintage gem into a stunning centerpiece for your home.
Step 1: Gather Your Supplies
Before diving in, it’s essential to gather all your necessary tools and materials. Here’s a quick list to help you get started:
- Staple gun and staples
- Fabric (enough to cover the chair)
- Foam padding or batting (if needed)
- Scissors
- Screwdriver
- Paint (if you’re planning to refresh the frame)
- Sandpaper (for prepping the frame)
- Protective gloves and mask
Step 2: Remove the Old Upholstery
Now comes the fun part! Carefully strip away the old fabric. Use your screwdriver to remove any screws that hold the seat cushion or back in place. As you peel off the fabric, take note of how it was originally attached. This will serve as a reference when you reupholster your chair. Keep any padding that’s still in good shape, but don’t hesitate to replace it if it seems worn out.
Step 3: Prep the Frame
With the fabric removed, it’s time to give your chair frame some attention. If there are any scratches or rough spots, use sandpaper to smooth them out. This step is especially important if you plan to paint the frame. Choose a color that complements your new fabric—this is your chance to get creative!
Step 4: Reupholster with New Fabric
Once your frame is prepped and painted (if you chose to do that), it’s time to put on the new fabric. Lay your new fabric out on a flat surface and cut it to size, allowing extra for stapling. Start with the seat cushion, aligning the fabric neatly, and pull it tight before securing it with your staple gun. Continue with the backrest and sides, making sure everything is smooth and taut. Don’t be afraid to adjust as you go along!
Step 5: Final Touches
Now that your chair is reupholstered, it’s time for the finishing touches. Reattach any screws you removed earlier, and check for any loose staples. Give your chair a final inspection—this is your moment to make sure everything looks just right!
Step 6: Show Off Your Work!
Congratulations! You’ve upcycled your wingback chair into a fabulous new piece. Now, it’s time to find a perfect spot in your home to showcase your handiwork. Whether it’s a cozy reading nook or a statement piece in your living room, your upcycled chair is sure to spark conversations and admiration.
And there you have it! Upcycling can be a rewarding experience, both creatively and environmentally. Happy upcycling!
Creative Ideas for Customizing Your Upcycled Wingback Chair
Isn’t it exciting to think about all the ways you can breathe new life into your upcycled wingback chair? This beloved piece of furniture can be a canvas for your creativity, allowing you to express your personality and style. Let’s dive into some fun and inventive ideas that will make your wingback chair truly one-of-a-kind!
1. Bold Fabrics and Patterns
One of the simplest ways to customize your wingback chair is through upholstery. Choose a fabric that speaks to you! Here are a few ideas:
- Bright Colors: Opt for vibrant colors like teal, mustard yellow, or coral to make a statement.
- Unique Patterns: Floral, geometric, or even vintage prints can transform your chair into a showstopper.
- Texture: Consider materials like velvet or chenille for a cozy touch.
Remember, the fabric you choose can totally change the vibe of your space, so have fun with it!
2. Add Some Bling with Trims and Details
Don’t underestimate the power of trims and embellishments! Here are a few ideas to make your chair pop:
- Piping: Add piping along the seams for a tailored look.
- Fringe: A fringe trim can give it a playful, bohemian feel.
- Buttons: Consider tufting with buttons for a sophisticated touch.
These little details can elevate your chair from ordinary to extraordinary!
3. DIY Painting Techniques
If you’re feeling adventurous, why not try some DIY painting techniques? Here are a couple of suggestions:
- Stenciling: Use stencils to add designs to the chair frame or even the upholstery (make sure to use fabric paint!).
- Ombre Effect: Create a stunning ombre effect by gradually blending two or more colors.
Just be sure to test your paint on a small area first to see how it adheres to the material!
4. Mix and Match
Why stick to one theme when you can mix and match? Combine different fabrics and textures for a quirky, eclectic look. Think of pairing a floral pattern on the back with a solid color on the seat. The contrast can be visually striking!
5. Accessorize with Throws and Cushions
Sometimes, the simplest solutions are the most effective. Add throws, cushions, or even a cozy blanket to your chair. Here are some ideas:
- Patterns and Colors: Choose cushions that complement or contrast with your chair’s fabric.
- Seasonal Decor: Change your accessories with the seasons for a fresh look year-round.
Accessorizing allows you to easily switch things up without committing to a full redesign!
6. Personal Touches
Finally, don’t forget to add your personal touches. Whether it’s a favorite quote on a pillow or a cherished item displayed nearby, these little elements can make your upcycled wingback chair feel like home.
So there you have it! With these creative ideas, your wingback chair is bound to become a stunning centerpiece in your home. Happy upcycling, and enjoy the journey of customization!
Related posts:
 Creative Commerce: Building a Business with Your Craft
CNC: Uncover Your Unique Product with CNC Machining
3D Printing: Profitable Ventures with 3D Printing
best personalization gifts
Creative Commerce: Building a Business with Your Craft
CNC: Uncover Your Unique Product with CNC Machining
3D Printing: Profitable Ventures with 3D Printing
best personalization gifts
 jersey personalization near me
how to upcycle a small white satellite dish
how to upcycle pill bottles
top upcycling
upcycled steampunk
jersey personalization near me
how to upcycle a small white satellite dish
how to upcycle pill bottles
top upcycling
upcycled steampunk
 how to price upcycled furniture
Comments