I. Creative Upcycling Ideas for Your Old Bookcase
II. Step-by-Step Guide to Transforming Your Bookcase
III. Essential Tools and Materials for Upcycling Projects
Creative Upcycling Ideas for Your Old Bookcase
Hey there! So, you’ve got an old bookcase collecting dust in your corner, huh? Instead of letting it languish in the shadows, why not breathe new life into it? Upcycling is the perfect way to express your creativity while giving your furniture a fresh purpose. Let’s dive into some fun and innovative ways to transform that old bookcase into something fabulous!
1. Turn It Into a Garden Display
If you love plants, consider converting your bookcase into a vertical garden! Just think about it: you can fill those shelves with your favorite potted herbs, succulents, or even trailing vines. Here’s how you can do it:
- Remove any shelves: Make sure to create space for larger pots.
- Paint or line the back: A splash of color or patterned wallpaper can add a vibrant backdrop.
- Arrange your plants: Use varying heights and types of plants for visual interest.
2. Create a Cozy Pet Bed
Got furry friends? Why not transform your old bookcase into a stylish pet bed? This is not only practical but also a lovely way to integrate your pet into your home decor. Here’s how to get started:
- Choose the right space: Look for a bottom shelf that can comfortably fit your pet.
- Add cushions: Make it plush and inviting with soft blankets or cushions.
- Accessorize: Personalize it with a cute sign or maybe some of your pet’s favorite toys.
3. Craft a Unique Wine Rack
If you’re a wine enthusiast, an upcycled bookcase can become a chic wine rack! Not only will it store your bottles, but it can also display your wine glasses. Here’s a quick blueprint:
- Remove extra shelves: This will create enough room for vertical bottle storage.
- Add hooks: Install some hooks on the sides for hanging wine glasses.
- Style it up: Use decorative elements, such as coasters or wine-related art, for a finished look.
4. Design a Play Kitchen for Kids
If you have little ones at home, they’ll love having their very own play kitchen! An old bookcase can easily be transformed into a mini kitchen setup:
- Paint it in fun colors: Use bright, cheerful paint to get those creative juices flowing.
- Add faux appliances: Use cardboard or other materials to create a stove, oven, and sink.
- Accessorize with play food: Fill the shelves with toy dishes and food items for realistic play!
5. Make It a Stylish Home Office
With remote work becoming more common, why not turn your bookcase into a chic workspace? Here’s how to set up a cozy corner:
- Clear out the shelves: Make room for necessary office supplies and decor.
- Add a desk surface: Place a sturdy board on top to create a workspace.
- Decorate: Personalize it with inspiring quotes, plants, and photos to make it feel uniquely yours.
There you have it! Five creative ideas to upcycle that old bookcase. The beauty of upcycling is that you can make it truly your own, reflecting your personal style while also being practical. So, roll up your sleeves and let your imagination run wild!
Step-by-Step Guide to Transforming Your Bookcase
So, you’ve decided to upcycle that old bookcase sitting in your garage or living room? Fantastic choice! Transforming your bookcase can breathe new life into it and give your space a fresh vibe. Let’s walk through this step-by-step guide to help you create something truly unique and beautiful.
Step 1: Assess Your Bookcase
Before diving in, take a good look at your bookcase. Check for any damage, such as scratches, dents, or loose shelves. This assessment will help you decide if you need to repair it first. If it’s in decent shape, you can move on to the fun stuff!
Step 2: Gather Your Inspiration
Look for design ideas that resonate with you. Browse platforms like Pinterest or Instagram for upcycling inspiration. You might find ideas ranging from turning your bookcase into a mini bar to transforming it into a cozy reading nook. Jot down your favorites and consider how you can personalize them!
Step 3: Choose a New Color or Finish
A fresh coat of paint or a new stain can work wonders. Think about the mood you want to create:
- Bright colors for a fun, energetic vibe.
- Pastels for a soft, calming atmosphere.
- Deep stains for a rustic, sophisticated look.
Once you’ve decided on a color, prep your bookcase by cleaning it thoroughly. If you’re painting, lightly sand the surface to help the paint adhere better.
Step 4: Add Creative Touches
This is where things get exciting! Consider these creative ideas to enhance your bookcase:
- Wallpaper or Fabric Backing: Add some personality by attaching wallpaper or fabric to the back of the bookcase. This can create a striking contrast with the front.
- New Hardware: Swapping out old knobs for chic handles can give your bookcase a modern edge.
- Shelving Options: Consider removing some shelves to create a larger space for decor or adding adjustable shelves for versatility.
Step 5: Reassemble and Organize
Once you’ve made all the changes, it’s time to reassemble! If you’ve taken shelves out or added new features, make sure everything is sturdy. Now comes the fun part—organizing your items! Here are a few tips:
- Group similar items together (like books, decor, or plants).
- Use decorative boxes or baskets to keep smaller items contained.
- Experiment with different arrangements until you find a visually pleasing setup.
Step 6: Enjoy Your Creation!
Stand back and admire your handiwork! Take a moment to enjoy the transformation you’ve achieved. Whether you’ve created a stylish storage solution, a chic display, or a cozy reading corner, you’ve added a personal touch to your space that truly reflects who you are.
With just a bit of creativity and effort, your old bookcase can become a one-of-a-kind piece that you’ll cherish for years to come. Happy upcycling!
Essential Tools and Materials for Upcycling Projects
Upcycling your old bookcase into something fresh and fabulous can be a delightful weekend project! But before you roll up your sleeves and dive in, it’s important to gather all the right tools and materials. This will not only make your process smoother but will also ensure that your transformation is a success. Let’s take a look at what you’ll need!
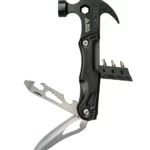
1. Basic Tools
First things first, you’ll want to have a solid set of basic tools at your disposal:
- Screwdriver: A trusty screwdriver will help you disassemble your bookcase if needed. A power drill with screwdriver bits might save you time and effort!
- Hammer: For those instances where a little persuasion is needed to get those nails out or to assemble parts of your new creation.
- Measuring Tape: Accurate measurements are crucial, especially if you’re building something new out of your old bookcase.
- Paintbrushes or Rollers: Whether you’re painting or staining, having the right brushes or rollers will make the application much easier and cleaner.
2. Safety Gear
Safety first! It’s important to protect yourself while you work. Consider adding the following to your checklist:
- Work Gloves: These will protect your hands from splinters and cuts.
- Safety Goggles: If you’re sanding or cutting, goggles can keep dust and debris out of your eyes.
- Masking Tape: Useful for protecting areas you don’t want to paint or stain. Plus, it helps you create clean lines!
3. Painting and Finishing Supplies
Color is what will bring your upcycled bookcase to life! Consider these supplies:
- Paint or Stain: Choose a high-quality paint or wood stain that suits your style. Don’t forget to pick up a primer if you’re painting over a dark color!
- Topcoat: A protective finish, such as a polyurethane or wax, will help seal your work and keep it looking fabulous for years to come.
4. Decorative Elements
This is where your creativity can shine! Here are some fun decorative elements to consider:
- Fabric or Wallpaper: Use to line the shelves or back panel of your bookcase for a pop of color and texture.
- Hardware: New knobs or handles can give your bookcase a completely new look. Explore vintage shops for unique finds!
- Stencils or Decals: Add some artistic flair with stencils or decals that resonate with your personal style.
5. Additional Materials
Finally, think about other materials that might enhance your project:
- Wood Glue: Ideal for reinforcing joints or attaching new parts to your bookcase.
- Sandpaper: Essential for smoothing surfaces before painting or staining.
- Clamps: These will hold pieces together while the glue dries, ensuring a sturdy build.
With these tools and materials in hand, you’re well-equipped to embark on your upcycling adventure. Remember, it’s all about having fun and expressing your creativity, so don’t be afraid to experiment. Happy upcycling!


Comments