I. Creative Upcycling Ideas for Your 9 x 13 Cake Pan
II. Step-by-Step Guide to Transforming Your Cake Pan
III. Tips for Maintaining and Personalizing Your Upcycled Cake Pan
Creative Upcycling Ideas for Your 9 x 13 Cake Pan
Hey there, fellow crafter! If you’ve got an old 9 x 13 cake pan that’s seen better days, don’t toss it out just yet! There’s a world of creative possibilities waiting for you with this humble kitchen item. Let’s dive into some fun and innovative upcycling ideas that will breathe new life into your cake pan.
1. DIY Garden Planter
Your cake pan can become a charming garden planter. Just add some drainage holes in the bottom, fill it with potting soil, and plant your favorite herbs or flowers. It’s a great way to add a dash of green to your home, and you can even decorate the pan with paint or decoupage to suit your style!
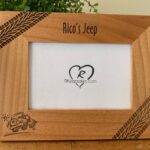
2. Unique Wall Art
How about transforming your cake pan into a piece of wall art? You can paint it in vibrant colors, or cover it with fabric to match your decor. Once it’s dressed up, hang it on your wall as a decorative piece. It’s an unexpected touch that will surely draw attention!
3. Catch-All Tray
Use your cake pan as a catch-all tray for your entryway or kitchen. It’s the perfect size for holding keys, mail, or loose change. You can personalize it with some fancy paint or even stencils to make it a stylish addition to your home.
4. Pet Food Station
If you have furry friends at home, consider upcycling your cake pan into a pet food station! Fill the pan with kibble or treats and place it in a designated spot. You can even create a matching set of pans for food and water. Plus, it’s much easier to clean than a traditional bowl!
5. Craft Supply Organizer
Get those craft supplies in order by using your cake pan as an organizer! You can use it to hold markers, scissors, or buttons. Add dividers made from cardboard to create sections, keeping everything neat and tidy. It’s an excellent way to repurpose your pan while keeping your workspace clutter-free.
6. Baking Sheet for Non-Food Items
Although it’s primarily a baking pan, your 9 x 13 cake pan can also serve as a baking sheet for non-food items. Use it to create fun and easy wax melts or homemade soap! Just line the pan and pour in your mixture, letting it cool before cutting into fun shapes.
7. Kids’ DIY Project
Looking for something fun to do with the kiddos? Get creative together by turning your cake pan into a DIY project. They can paint it, fill it with sand and little toys for a sensory experience, or even use it as a base for a mini diorama. The possibilities are endless!
So there you have it! Seven exciting ways to upcycle your 9 x 13 cake pan. With just a little creativity and some elbow grease, you can transform this kitchen staple into something truly unique. Remember, the sky’s the limit when it comes to your imagination—or should I say, your craft-cake pan skills?
Step-by-Step Guide to Transforming Your Cake Pan
Ready to breathe new life into that 9 x 13 cake pan? You might be surprised at how many creative projects you can tackle with just one pan. Let’s dive into a simple step-by-step guide that will help you transform your cake pan into something fresh and fabulous!
Step 1: Choose Your Project
First things first, decide what you want to create. Here are a few fun ideas to spark your imagination:
- Garden Planter: Perfect for small succulents or herbs!
- Wall Art: Make a unique piece for your home.
- Serving Tray: Great for parties or casual get-togethers.
- Pet Food Dish: A stylish way to feed your furry friend.
Step 2: Gather Your Materials
Once you’ve chosen your project, it’s time to gather your supplies. Here’s a basic list to get you started:
- Your 9 x 13 cake pan
- Sandpaper (fine grit)
- Acrylic paint or spray paint
- Mod Podge (if creating wall art or a serving tray)
- Sealer (optional for outdoor projects)
- Decorative elements (like stickers, fabric, or tiles)
Step 3: Prepare Your Cake Pan
Time to prep! Start by washing your cake pan thoroughly with soap and water. Once it’s clean, dry it completely. If you’re going for a painted look, grab your sandpaper and gently sand the surface. This helps the paint adhere better. Just a light sanding is all you need—no need to overdo it!
Step 4: Paint Away
Now comes the fun part—painting! If you opted for spray paint, make sure to do this in a well-ventilated area or outside to avoid fumes. Apply a few light coats instead of one thick coat for a smooth finish. If you’re using acrylic paint, a foam brush can help you get an even layer. Let your masterpiece dry thoroughly before moving on to the next step!
Step 5: Add Personal Touches
Here’s where you can let your creativity shine! Use Mod Podge to adhere decorative elements like beautiful paper or fabric. If you’re making wall art, you might want to add inspirational quotes or photos. For a serving tray, consider adding rope handles for an extra touch. Whatever you choose, make sure it reflects your style!
Step 6: Seal Your Work (if necessary)
For projects that will be outside or used frequently, a protective sealant is a great idea. This will prolong the life of your creation and keep it looking fresh. Just follow the instructions on your sealer, and let it dry completely.
Step 7: Find a New Home for Your Creation
Now that your cake pan has been transformed, it’s time to show it off! Place your new planter in a sunny spot, hang your wall art, or serve delicious snacks to your guests on your stylish tray. You’ve not only upcycled but also created something uniquely yours!
And there you have it—a straightforward guide to transforming your humble cake pan into something spectacular. Now roll up your sleeves and let your creativity take flight!
Tips for Maintaining and Personalizing Your Upcycled Cake Pan
So, you’ve transformed your trusty 9 x 13 cake pan into something fabulous! Whether it’s a trendy storage solution or a quirky wall art piece, keeping it in tip-top shape is essential. Here are some friendly tips to help you maintain and personalize your upcycled creation while ensuring it remains a cherished item in your home.
1. Cleaning and Maintenance
No matter what new purpose your cake pan has taken on, proper cleaning is crucial. Here are some handy tips:
- Gentle Clean: Always opt for mild soap and water. Avoid harsh cleaners that can damage the surface or finish.
- Dry Thoroughly: After washing, ensure that your pan is completely dry to prevent rust or deterioration, especially if it’s made of metal.
- Protect the Finish: If your cake pan is painted or has a finish, consider applying a clear sealant to protect it from wear and tear. Just make sure to use a product that’s safe for the material!
2. Personalizing Your Upcycled Creation
Now that your cake pan is clean and well-maintained, it’s time to add some personal flair. Personalization can turn a simple piece into a beloved treasure.
- Paint It Up: Give your cake pan a splash of color with acrylic paint. You can create patterns, designs, or even a monogram. Just remember to seal it afterward for durability.
- Decoupage Delight: If you’re feeling crafty, try decoupage! Use decorative paper or fabric to cover the surface. Apply a layer of mod podge to seal it all in.
- Labels and Tags: If your pan is serving a practical purpose, consider adding labels. Chalkboard paint can create a writable surface, making it easy to label contents or change them as needed.
- Accessorize: Add hooks or hangers to the back for a unique wall display. You can hang it alongside other upcycled items for a cohesive look.
3. Storage Tips
Maintaining the quality of your upcycled cake pan also depends on how you store it. Here are some strategies to keep it safe and sound:
- Keep It Covered: If you’re using your cake pan for storage, ensure it’s covered to protect it from dust and damage.
- Avoid Stacking: If possible, avoid stacking heavier items on top of your upcycled pan. This will help maintain its shape and integrity.
- Display It: If your pan is a work of art, find a prominent place to display it! Consider using a shelf or a wall-mounted rack that compliments your home decor.
With these maintenance and personalization tips, your upcycled 9 x 13 cake pan will not only look fantastic but also serve its new purpose with flair. Enjoy the creative process and have fun making it uniquely yours!


Comments