I. Essential Tools for Upcycling Furniture: A Beginner’s Guide
II. Creative Techniques for Transforming Old Furniture
III. Safety Tips and Best Practices for Upcycling Projects
Essential Tools for Upcycling Furniture: A Beginner’s Guide
Hey there, fellow DIY enthusiast! If you’ve decided to dive into the fabulous world of upcycling furniture, you’re in for a treat. Not only can you breathe new life into old pieces, but you can also unleash your creativity and make something truly unique. Before you grab that paintbrush or sander, let’s talk about the essential tools you’ll need to get started on your upcycling journey.
1. The Basics: Hand Tools You Can’t Live Without
First things first, let’s get into the hand tools. These are the trusty sidekicks that will help you tackle most of your upcycling projects:
- Screwdriver Set: A good set of screwdrivers in various sizes is a must-have. You’ll be taking apart furniture pieces, and having the right screwdriver can make all the difference.
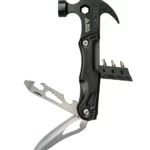
- Hammer: Whether you’re removing nails or tapping joints into place, a hammer is essential. Look for one that feels comfortable in your hand.
- Measuring Tape: You’ll want to measure twice and cut once! A measuring tape will help you ensure that everything fits perfectly.
- Utility Knife: Great for trimming or cutting materials, this tool is versatile and handy for all sorts of projects.
2. Power Tools for the Brave
If you’re feeling adventurous and want to speed up your work, consider investing in some power tools. Here are a few that can help you elevate your upcycling game:
- Power Drill: A cordless drill is a game-changer! It makes drilling holes and driving screws a breeze. Just be sure to have a variety of drill bits on hand for different tasks.
- Sander: If you want a smooth finish, a sander is crucial. You can go for a palm sander for smaller projects or a belt sander for larger surfaces.
- Circular Saw: Perfect for cutting wood quickly and accurately. Just make sure you’re comfortable with it before you start cutting!
3. Painting and Finishing Tools
Once you’ve got your pieces prepped, it’s time to bring on the color! Here are some painting and finishing tools you’ll want to keep handy:
- Paintbrushes: Invest in a variety of sizes. You’ll want small brushes for detail work and larger ones for bigger surfaces.
- Rollers: Great for covering large areas quickly, especially if you’re painting chairs or tables.
- Drop Cloths: Protect your floors and surfaces! A drop cloth will save you from potential paint disasters.
- Sealers and Finishes: Depending on your project, consider using a clear sealer to protect your work and enhance its durability.
4. Safety Gear: Always Important!
Last but not least, let’s not forget about safety gear! Upcycling can get messy, so it’s smart to protect yourself:
- Safety Glasses: Protect your eyes from dust and debris.
- Dust Mask: Wear a mask to avoid inhaling harmful particles, especially when sanding.
- Gloves: Keep your hands safe from chemicals and rough surfaces.
So there you have it! With these essential tools in your arsenal, you’re ready to embark on your upcycling adventure. Remember, the most important thing is to have fun and let your creativity shine. Happy upcycling!
Creative Techniques for Transforming Old Furniture
Upcycling furniture is not just about giving your old pieces a new lease on life; it’s also a fun and creative journey! Whether you’re an experienced DIYer or just starting out, there are countless ways to breathe new life into tired furniture. Let’s dive into some imaginative techniques that can inspire your next project!
1. Painting Magic
One of the simplest yet most transformative techniques is painting. A fresh coat of paint can turn a dreary piece into a stunning focal point. Here are some tips:
- Choose the Right Paint: Use chalk paint for a matte finish and easy distressing, or opt for acrylic paint for a sleek, modern look.
- Prep Your Surface: Make sure to clean and lightly sand the furniture before painting to ensure better adhesion.
- Experiment with Colors: Don’t shy away from bold colors or even a two-tone design to really make your piece pop!
2. Adding Texture with Fabric
If you have an old chair or ottoman, consider reupholstering it with vibrant fabric. A little fabric can go a long way. Here’s how to get started:
- Select Your Fabric: Look for durable fabrics in fun patterns or colors that suit your style.
- Use Foam Padding: If the cushions are worn out, replace them with new foam for extra comfort.
- Get Crafty: Use a staple gun to attach the fabric securely, and don’t forget to tuck it neatly for a polished look!
3. Distressing Techniques
If you love that vintage, rustic charm, distressing is the way to go! This technique adds character and tells a story. Here are a few methods:
- Sanding: Lightly sand edges and corners to create a worn look.
- Paint Layering: Apply a base coat, then a top coat in a contrasting color. After it dries, sand down areas to reveal the base color underneath.
- Using a Stain: Apply a wood stain to highlight details or create an aged effect.
4. Creative Hardware Changes
Sometimes, all a piece needs is a little hardware love! Switching out knobs and handles can elevate a piece from drab to fab:
- Unique Knobs: Look for vintage knobs at flea markets or online for that quirky touch.
- Mix and Match: Don’t be afraid to combine different styles and sizes for an eclectic vibe!
5. Functional Art
Why not take your upcycling project a step further and create functional art? Consider these ideas:
- Bookcase to Bench: Turn a bookcase on its side and add some cushions to create a cozy reading nook.
- Old Doors as Tables: Use a reclaimed door as a tabletop and pair it with some sturdy legs for a unique dining table.
In conclusion, upcycling furniture opens up a world of creativity and possibility. Don’t be afraid to experiment and let your personal style shine through every project. Remember, the goal is to have fun and enjoy the process of transforming old furniture into something extraordinary!
Safety Tips and Best Practices for Upcycling Projects
Hey there, fellow upcyclers! If you’re diving into the world of furniture transformation, it’s super important to keep safety at the forefront of your creative endeavors. After all, what’s a fun project without a little bit of common sense? So, let’s chat about some essential safety tips and best practices to ensure you can enjoy your upcycling projects without any hiccups!
1. Gear Up: Dress for Success
Before you even think about picking up that old chair or dresser, make sure you’re dressed appropriately. Think of your outfit as your armor!
- Wear sturdy clothing: Long sleeves and pants can protect your skin from splinters and paint splashes.
- Don’t forget closed-toe shoes: Accidents happen; you want to protect those toes!
- Use gloves: A good pair of work gloves can save your hands from rough surfaces and sharp edges.
- Safety goggles: Protect your eyes from dust and debris when sanding or cutting.
2. Know Your Materials
It’s easy to get caught up in the excitement of a new project, but understanding your materials is crucial. Different materials come with different risks!
- Check for lead paint: If your furniture is old, especially pre-1978, it might contain lead paint. Consider getting a lead test kit before you start.
- Avoid toxic finishes: Look for water-based paints and finishes as they’re generally safer for indoor use than oil-based ones.
- Wood types: Some woods can be harmful when sanded, like mahogany and cedar. Always research your materials before getting started.
3. Set Up Your Workspace
A well-organized workspace can make a world of difference. Here’s how to create a safe environment:
- Choose the right location: If you’re using strong chemicals or power tools, work in a well-ventilated area.
- Keep it tidy: Clear away any clutter that might pose a tripping hazard.
- Have a first-aid kit handy: Accidents can happen, so it’s wise to have basic supplies on hand, just in case.
4. Use Tools Wisely
Power tools can be a game-changer for your upcycling projects, but safety should always come first:
- Read instructions: Familiarize yourself with any new tool before using it.
- Use the right tool for the job: Don’t improvise; it could lead to accidents or damage.
- Unplug when not in use: This prevents accidental starts while you’re switching materials or tools.
5. Stay Focused and Have Fun!
Lastly, remember that while safety is paramount, upcycling is also about enjoying your creativity! Stay focused, but don’t forget to have fun along the way. If you feel overwhelmed or tired, take a break. Pushing through can lead to mistakes or accidents.
So there you have it, some friendly safety tips to help guide you on your upcycling adventures. Embrace your inner designer, but always keep safety in mind—your future self will thank you!


Comments